RICK
BUILDS A MORRIS CHAIR
Several years ago, at a time when Elaine and I were
considering designing a new house, I became very interested in the Arts and
Crafts movement, and the furniture associated with it. The Arts and Crafts
movement actually originated in England in the late 19th century, and was
brought to America through the works of such artisans as William Morris,
John Ruskin, Nicholas Jenson, Philip Webb, and later by Gustav Stickley and
his brothers, and by brothers Charles Sumner Greene and Henry Mather Greene.
This movement was a backlash against industrialism,
an attempt to return, at least philosophically, to the day of skilled
craftsmanship, and the production of beautiful pieces one at a time.
As both a writer and a woodworker, this concept
strongly attracted me.
"Have nothing in
your house that you do not know to be useful, or believe to be beautiful."
-William Morris
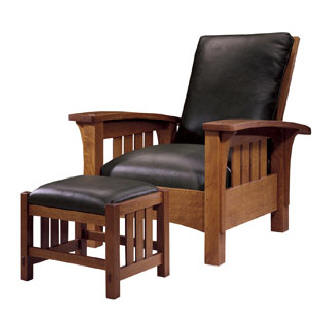
The chair pictured above is one example of the
realization of the Arts and Crafts philosophy. While it is called a Morris
Chair, in that the original concept was developed by William Morris, it
really is an interpretation of Gustav ("Gus" from now on) Stickley and his
brothers Leopold, Albert, Charles, and John George.
Together, they brought the Arts and Crafts movement
to a new American culture, through their furniture, and through the magazine
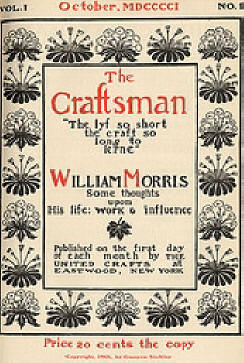
The Craftsman, which Gus Stickley founded and edited beginning in
1901. In all their work, they attempted to embody the Craftsman philosophy
as stated by William Morris (right).
The Arts and Crafts movement is more than just a style
or a technique. It is a way of thinking. It's about taking the time to
assure that everything your hands produce is as well-crafted as you can make
it. There is a Zen quality to the movement. Properly executed, a fine piece
of Arts and Crafts furniture, pottery, wallpaper, or even an entire house,
should not only please the eye, but also should impart on its user a sense
of peace and serenity.
As envisioned by the Stickley brothers, Arts and
Crafts furniture was intended for the masses. It was fine furniture crafted
for the middle class.
In order to provide as many people as possible the
benefits of Craftsman thinking and workmanship, the Stickley brothers began
to incorporate factory methods--including machinery--to construct the basic
components of his pieces, which were then handed over to skilled craftsmen
for assembly, fitting, and finishing.
This tradition remains with us today, as
exemplified by the work of such popular carpenters as Norm Abram of The
New Yankee Workshop.
A couple of years back, I remodeled my home office. At
the time, I installed a cheap papasan chair for reading, and always intended
that it would be temporary. In the back of my mind was a plan to replace it
with something beautiful, more befitting the room which serves as both my
personal library and the place where I create my books and short stories.
On this page, I plan to follow--step by step--the
process of crafting a Stickley-style Morris chair, as illustrated above. The
picture at the top of the page is from the plans I'll be using.
This chair has all the hallmarks of the height of
Stickley's craft. The bowed arms, which will be constructed by laminating
thin layers of oak over a plywood mold, provide a restful place for the
reader's arms. The back cushion reclines to allow the owner to take a
restful nap, and raises easily to a reading position. This chair is the
perfect place to lounge away a cold, snowy winter afternoon. I can't wait to
use it as the final component of my perfect home office.
As with other projects I've outlined on these pages,
the wood that I'll use for this project is classic and traditional. Stickley
made most of his furniture from quarter-sawn white oak (Quercas alba).
Oak, besides being heavy, is very stable in use, and when cut on the quarter
it displays a remarkable medullary ray fleck. It is also relatively easy on
machine blades as compared to other dense woods like, say, jatoba or some
rosewoods. Finally, it's just traditional.
Quarter-sawing is the process of milling logs in a
way that keeps the growth rings perpendicular to the width of the board.
While, ideally, the growth rings should be 90 degrees to the plane of the
board, a deviation of up to 30 degrees is usually acceptable. Cutting boards
on the quarter helps to prevent warping and cupping of the boards as the
fibers expand and contract in heat, cold, and humidity.
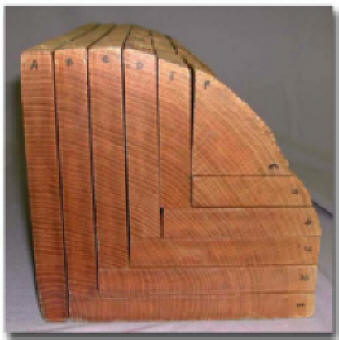
One reason that white oak is the traditional choice
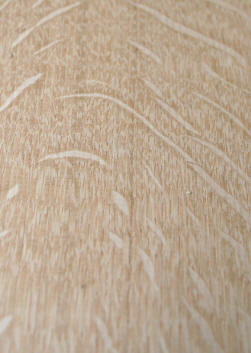
for Arts and Crafts furniture is its natural beauty. One peculiarity with
white oak is its tendency to develop "medullary rays". Within the heartwood
of the trees, some areas of wood have a different cellular structure. When
sawn on the quarter, these areas of medullary rays reflect light differently
the other heartwood does. These rays radiate from the center of the oak log
to the bark, like a lighthouse beam from the lighthouse itself. When the log
is quarter sawn, the rays are cut at a very low angle compared to slab
sawing, and this low angle shows off more of the rays' surface. Also,
medullary ray flecks take finishes differently than the rest of the
heartwood, so the finished piece takes on a beautiful variegated figure. Of
course, it takes considerably more effort to quartersaw boards, and it
results in less usable board feet. For that reason, quartersawn white oak is
more expensive than slab-sawn lumber. It's worth it, though. The main point
is to try to use as much of every board you have as possible, in order to
minimize waste. White oak isn't endangered at all, and supplies are fairly
plentiful, but why waste the money by tossing pieces of it into the dumper?
What I don't use for the chair will be saved for other projects.
Of course, if you've been reading some of my other
woodworking pages, you know that I like to start out with rough-sawn boards.
First, they are cheaper. Second, I always enjoy the process of milling them
to proper size ("dimensioning"), and seeing what kind of figure is revealed
underneath the surface as it smoothes out.
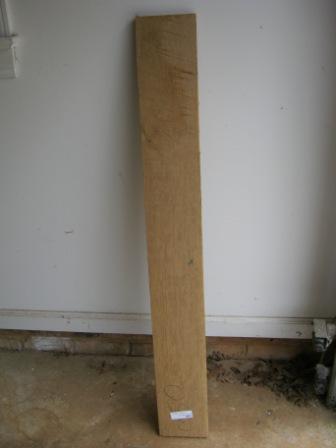
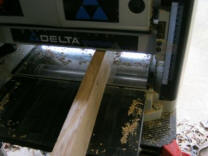
Here is the first quarter-sawn white oak board I'll
be using. I picked all of these boards up from Woodcraft in Charlotte.
I don't want to mill the entire board yet, because
different pieces of this Stickley-inspired chair project will have different
widths and thicknesses.
So, the first step is to rip and crosscut this
larger board into smaller pieces.
The first pieces I'll be building are the legs. Of
course, there are four of them, but in the case of this chair they each will
require four pieces of wood. Remember that business earlier about the
medullary ray flecks? In order to maximize the beauty of the chair, I want
all four sides of each leg to display the rays. Each leg is 2.25" square.
Finding boards pre-dimensioned to this size is pretty difficult. That leaves
me with several options. The first option is to laminate two or three boards
together to make one board that is 2.25" square. However, that sort of leg
would only display the ray flecks on two sides. I could possibly cover those
non-quartered sides with some quartered veneer, but that would create the
possibility that the veneer might delaminate (pull away from the leg) in the
future.
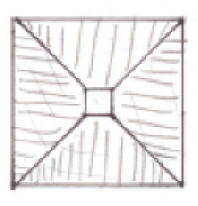
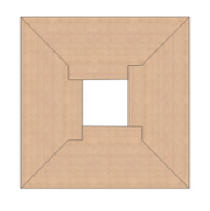
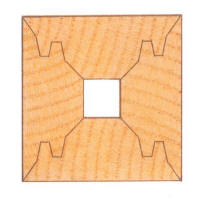
The obvious answer is to use quadrilinear legs.
Here, I'm drawing a line down the midline of the board.
The next step is... What's that? You don't know what a
quadrilinear leg is? Well, why didn't you say so? Happy to tell you.
A quadrilinear leg is constructed from four
individual boards that are glued on edge, so that each one displays a
quarter-sawn face and its gorgeous ray fleck.
There are several ways to do this. One way is to
simply miter the edges of the four boards at a 45 degree angle, and glue
them together (top pic at right). This tends to produce a poor glue joint,
however, and may come apart at some point in the future.
Another way is to use some kind of interlocking
joint, that will increase the gluing area and limit movement of the joint,
such as the pic in the middle at the right. This is accomplished with a
special router bit, and can produce a stronger joint.
In our case, however, I'll be using a somewhat more
complicated joint (bottom picture, right). I'll show you how I make it
later.
Thanks, and a tip of the hat to
The Gus Guild website for these three pictures!
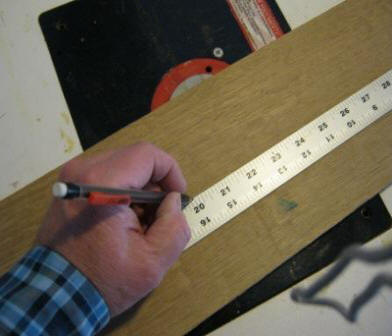
Okay! Now that I've marked the midline on my first
white oak board, I need to rip it into two pieces, hopefully of roughly
equal width.
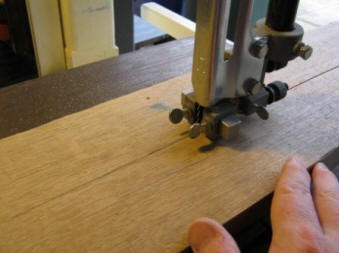
For this chore, I will turn to my favorite tool, my
trusty 14" Jet band saw.
For those who aren't acquainted with woodworking,
"ripping" a board means to make a cut alongside it's longer plane, usually
with the grain. If you saw across the short plan of the board, usually
across the grain, then you're doing a "crosscut".
There is also resawing, and we'll be doing some of
that later one, but it will be easier to explain it then, when I'll have
pictures.
By the way, this is the last time I used the band saw
to rip a board on this project. While it worked okay, oak is a tough wood,
and there was some deflection in the blade, which meant that the cut wasn't
totally straight. It was relatively easy to fix, but on the rest of the legs
I used my table saw, which made much straighter cuts.
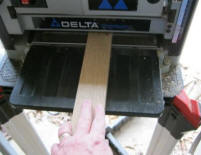
Now I turn to my bench planer. As I've said before, I
am always just a little scared when I use this machine. It revolves at
something like ten thousand RPM, and the two planer knives inside could turn
a hand into ribbons in less than a second. On the other hand, it really gets
the job done.
First, I pass the boards through on their edges, to
get a good straight joining edge. Then I pass them through on their flats.
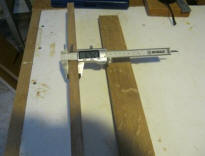
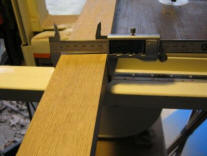
The goal is to get the boards to a little over 3/4 inch in thickness, and
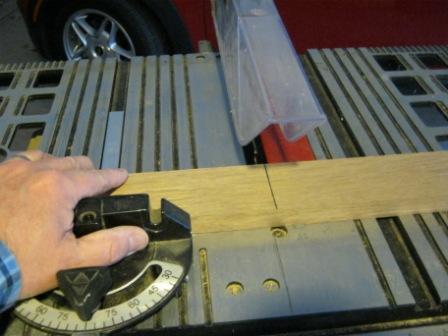
about 2.25 inches in width. I check the precision of the dimensioning using
my digital calipers. It's a little hard to see the numbers in these
pictures, but I leave them a little proud, because I'll still need to smooth
the legs once they are quadrilinearly jointed, and this will reduce their
size by roughly the amount that I oversized them.
Each of the front legs is about twenty-two inches in
length. I dimensioned each of these boards in four-foot lengths. Now it's
time to cut them in half. After marking their mid-length, I pass them
through the table saw.By the way, I
suppose you could also build this chair out of red oak that you can buy
pre-dimensioned at your local DIY home store (Lowes, Home Depot, etc.).
They've already done all this work for you, and once in a while you can
actually run across quarter-sawn pieces there.
Slacker.

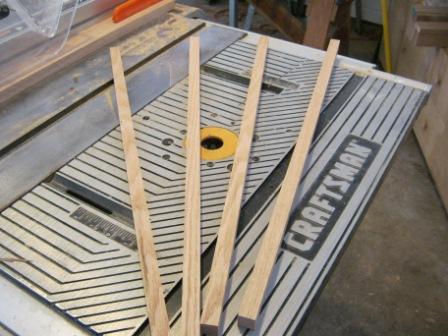
And here are the four pieces of the first front leg.
Notice how, now that they've been planed and smoothed, you can see the
medullary ray flecks? Believe me, this picture does not do these boards
justice. As you move around them, the changing light makes the flecks jump
out as they refract light differently. This is going to be one beautiful
leg!From roughsawn board to the four leg
pieces took about an hour and a half of work. Now I only have to do this
three more times, and I'll be ready to move on to the next step!
I'll spare you the details on dimensioning the
other three legs, and show you how I prepare them to be jointed.
Now that I have the sixteen pieces of the four legs
cut and dimensioned, it's time to rout out the interlocking cuts that will
hold them together. I bought a special router bit from Rocker, designed
specifically to cut the joints for the legs.
Here, I'm running one of the leg pieces through the
router. Because the router bit is so large, and white oak is a little
stringy and brittle, I have to take it very slowly to prevent tear-out.
Also, for those of you familiar with routers, this
is one time you ABSOLUTELY DON'T want to prevent tear-out by using a
climbing cut (or pushing the piece into the cutter in the direction of the
rotation. This bit WILL grab the piece and fling it across the shop. It
might even impale it in a wall. Don't ask me how I know this.
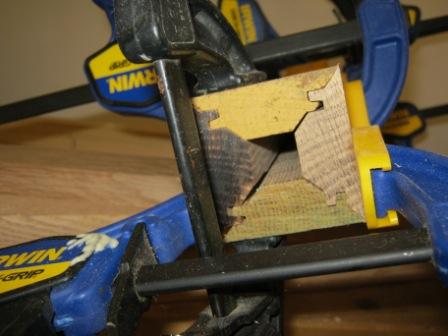
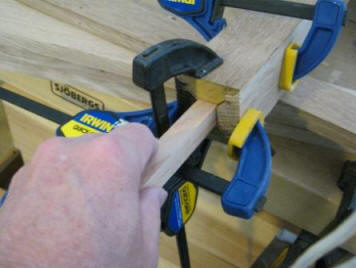
Here is a test fit of the four interlocking
quadrilinear pieces of one of the rear legs. Note that there appear to be
some gaps here and there in the joint. This is due to the tear-out and
chipping I referred to in the previous slide. It's not a problem, since the
only part that will be seen in the finished product is the outside, and
those joints look pretty tight.
I'll be gluing these legs using an expanding
urethane glue, which will fill these gaps.
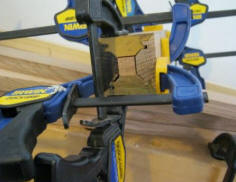
The real problem here is that big old gaping hole
in the middle of the leg. Later, we'll be cutting mortises in this leg and
running tenons into it. You can't join wood to air, so we need to fill this
gap. That's the next step.
Here are the filler bars for the legs. As I said
before, the primary benefit of using quartersawn white oak is its beautiful
medullary rays and flecks. Because quartersawing is not as economically
efficient as rift sawing, the wood it pretty expensive, too.
There's no point in using quartersawn white oak for
applications where the face is not visible. In the case of this chair,
I've decided to use red oak wherever the wood will be hidden, or only the
end grain will be visible. Red oak is renewable, relatively cheap, and you
can buy all you want at the local Home Despot.
For these filler bars, I just ripped them from a
two-foot long piece of red oak and dimensioned them to size using my planer.
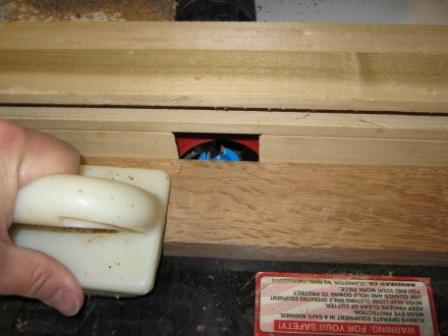
Here you can see how the filler bar fits into the leg.
I don't actually insert it after the leg is glued up. Instead, I assemble
the leg around the filler bar, so that the leg becomes one solid complete
unit.