PART FOUR
Building the Fretboard,
Completing Construction, and Finishing the Dulcimer
Unlike a guitar neck, which usually incorporates the
headstock and tuners, a mountain dulcimer's fretboard is usually constructed
separately from the peghead. I make my dulcimer fretboards in two
pieces--one the neck, and the other the actual fretboard. In this case, I
will be making the neck of the fretboard out of sapele, and the fretboard
itself out of purpleheart.
Sapele (Entandrophragma cylindricum) is
often referred to as "African mahogany". It is not a true mahogany, but it
shares a number of physical characteristics with the genus Swietenia .
It is stable, easily worked, takes finishes nicely, and--important to me--it
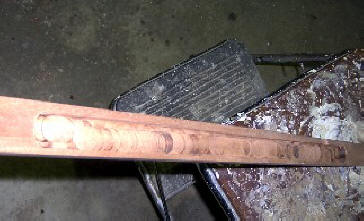
is extremely renewable. Here, I cut a strip of sapele about an inch and a
half wide from a board I had in stock.
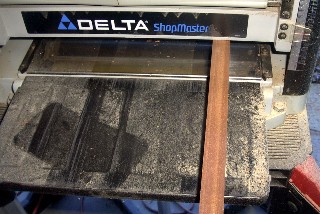
Here, I'm dimensioning the neck to size using my Delta
bench planer. You could also do this with a hand-held plane. In fact, as
I've mentioned before, you could make this entire instrument easily with
just hand tools. On the other hand, I have these power tools, and can't see
the point in not using them.
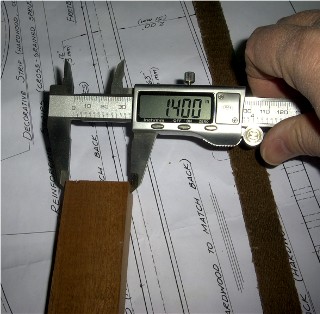
After dimensioning, the neck should be 1.400 inches
wide. Is the kid good, or what?
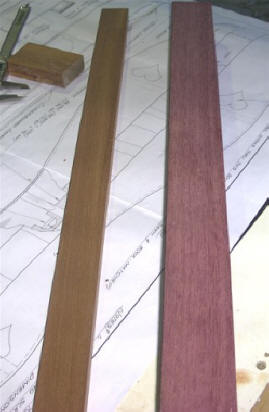
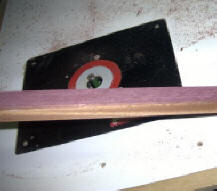
I've placed a strip of purpleheart (Peltogyne
porphyrocardia) next to the sapele neck. This will be the actual
fretboard. I chose purpleheart because I thought it was pretty. For certain,
there are harder and denser woods out there, but I thought it would be a
good choice for a folk instrument. In addition, it is not endangered or in
short supply. Even so, I bought just this small strip from Woodcraft. No
need to waste it if I won't be using it very often.
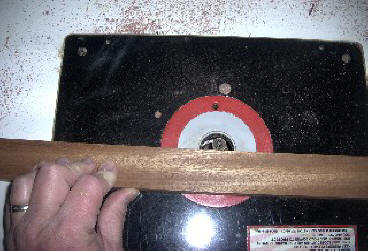
Unlike a lot of instruments, I'll actually glue the
purpleheart to the sapele neck before I machine the fretboard or install the
frets. In the bottom picture, right, I've glued the purpleheart fretboard to
the sapele neck, and clamped it using lots and lots of violin clamps.
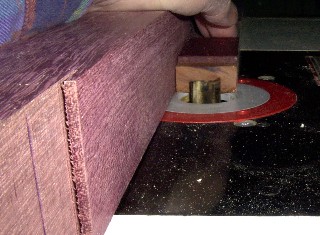
I use a flush-cutting bit in my router table to cut
the fretboard flush with theneck.
Again, you could do this easily with a hand plane.
My way was quicker, though.
Now comes a difficult part of the process. Sapele,
compared to some woods, is pretty light, but I really don't need the entire
mass of the neck to support the top, and I always try to get my instruments
as light as possible. So, I need to remove some material from the bottom of
the neck. Here, I've switched to a three-quarter inch bit in the router, and
I'm positioning a makeshift fence in place.
I can't just rout the underside of the neck from
one end to the other, because I will be hollowing out a strum valley later,
and I'll be tapering both ends of the neck. So, in order to hog out just
enough, I have to lower the neck onto the router bit several inches from
each end.
I'm not necessarily proud of this picture. It doesn't
represent my best work. However, the neck is very light, and the
three-quarter-inch bit is a lot of rotating mass. Keeping the neck centered
on the bit was a real chore. You can see where I had a little nick on the
lower right. Not a problem in terms of the finished product, but I'll know
it's there. Of course, once the neck is glued to the soundboard, nobody will
ever see this mess again, and it did relieve the neck of unwanted mass and
weight.
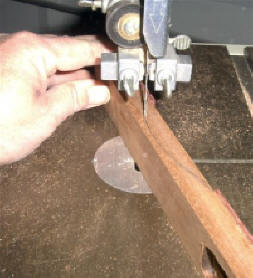
In the pictures above, I mark out the strum hollow and
the end tapers on the neck, and then cut them out using my Jet 14-inch
bandsaw. The bottom picture shows the roughed-out neck and fretboard.
There's still a little work to do before it can be glued to the dulcimer
body, though. It needs smoothing and sanding, and the frets need to be
installed.
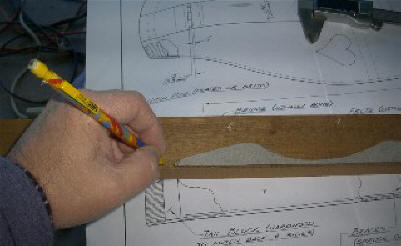
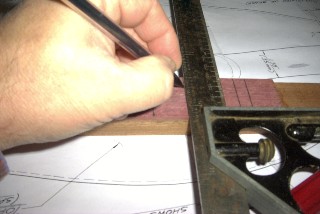
Marking out the lines for the fret slots. These have
to be placed very precisely, or the notes will sound sharp or flat. I'm
using a square that I inherited from my father, who bought it sometime back
in the 1950's or 1960's. I've tried new squares, but I keep going back to
this one. It works very nicely, and I've never had a problem with lines
being out of square with it. You find a tool you trust, and you stick with
it.
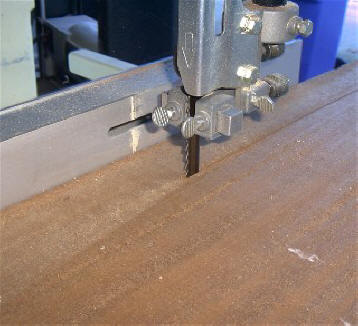
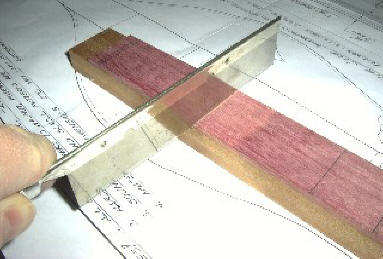
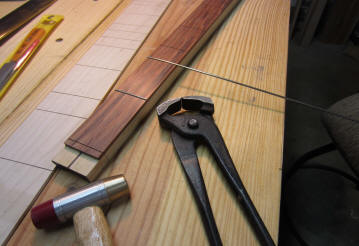
Cutting the fret slots. There is a power tool for
doing this, but I don't own it. So, I just use an XActo razor saw. This
picture is a good demonstration of the "mirror trick". You want your fret
slots to be perpendicular to the fretboard. One way to do it is to keep an
eye on the reflection in the saw blade. If you get a more-or-less continuous
line for the edge of the fretboard, you're cutting straight down and flat.
Just one of the little tricks you pick up over the course of building
instruments.
Following are a couple of "Boy, do I feel stupid"
pictures. I forgot to photograph the fretting and trimming process for the
neck, so I had to go out and borrow pictures that demonstrate the same
process I do from the internet.
Boy, do I feel stupid.
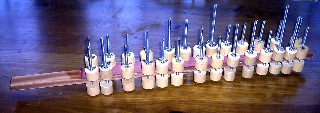
Anyway, after sawing the fret slots, you need to
install the frets. Frets come in the form of nickel-plated steel wire,
molded with a tanged ridge on the bottom to 'grip' the sides of the fret
slot. After wicking a very small amount of glue into the fret slot, I
lightly pound the wire into the slot using a dead-blow hammer, and then trim
the wire using the nippers shown here.
After the frets 'set' and the glue is dry, the next
step is to file down the ends. When you nip off the ends of the fretwire, it
leaves a very sharp burr. I use needle files and some speciality files I
bought from the Stewart-MacDonald luthier supply company to remove the burrs
so that the instrument can be played smoothly without tearing up the
player's hands.
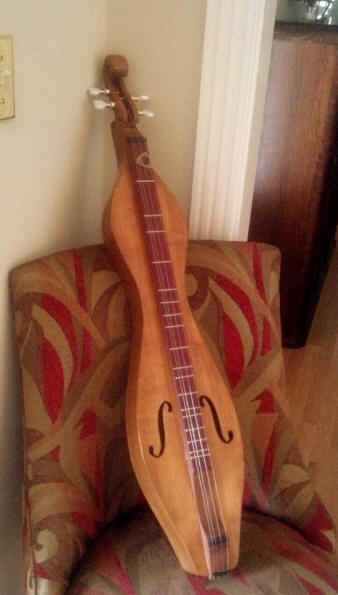
The finished product! After filing and smoothing the
frets, and sanding the neck, I glued the neck to the body. I sanded the
entire instrument to about 400 grit (a little overkill, I suppose), and then
I applied a coat of General Finishes Golden Oak gel stain and several coats
of satin gel poly to protect the instrument. I used Behlen fingerboard oil
on the purpleheart and sapele neck. I installed four end pins in the end
block of the dulcimer to secure the strings at the base, and I fashioned a
bridge and nut from ebony, and installed them at the top and bottom of the
neck. I decided at the last minute that I didn't like the tuning machines
I'd bought for it originally, so I ordered some straight banjo tuners from
Luthiers Mercantile, and installed them instead. I think they look a lot
better.
This one was a Christmas present for my daughter,
and she was very surprised to find it on Christmas morning! In all, it took
about thirty hours to complete this dulcimer, and now that you know how to
make it, you can build one too!