
PART 4
Preparing the Top
The top of the guitar is where you find the magic. It is the top that drives the vibrations from the strings, transmitted to it through the bridge. The top strongly influences the final sound of the guitar, and should be prepared with great delicacy.
Compounding the difficulty of properly preparing the guitar top is the fact that - in most cases - the top is made of very soft wood. For most makers, spruce or cedar are used. Some prefer Douglas fir, but these are pretty rare.
Spruce, despite being categorized as a softwood, is incredibly stiff. It's so stiff, in fact, that it was used for years as strut and propeller wood for airplanes, before more modern materials came along.
It is this stiffness that makes spruce the ideal wood for our guitar. We are using a variety called sitka (picea sitchensis) which is usually found in the Northwest. In fact, our spruce came from Alaska. I've had it sitting in my shop for three or four years, waiting to be used for a guitar.
I thicknessed and jointed the top exactly the same way I did with the back earlier. After gluing the two bookmatched halves together, I used a hardwood form to outline the shape of the top, and sawed it out on my bandsaw.
The next step is to install the rosette, and cut the soundhole.
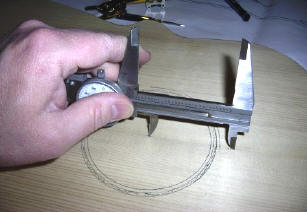
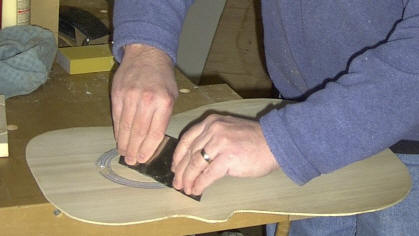
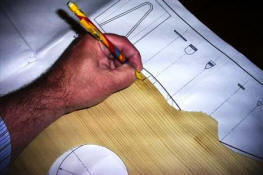
Here, I'm measuring out the spacing for the three rosette rings. On a Martin-style guitar, such as the one we're building, there are three concentric rings - one narrow, one wide, and one narrow. These rings are made out of thin strips of acetate, usually of contrasting colors. I have already measured the distance between the rings on the plans, and am transferring them to the top using my dial calipers.
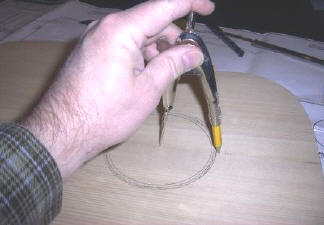
In this picture, I'm marking out the boundaries of the concentric rings.
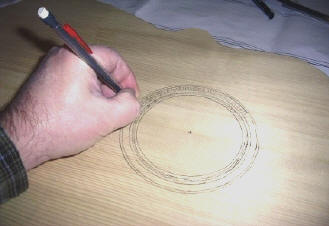
Here, I'm marking the waste areas that will be routed out later with my Dremel tool. It would be a tragedy to rout out the wrong part. You could ruin the entire top.
Don't ask me how I know this.
Okay, since you asked anyway, I have made that mistake. It required changing the entire concept of the rosette, and I was able to save the top, but it didn't look the way I had hoped.
Live and learn. Die and forget it all...
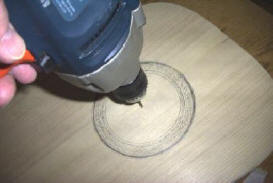
After marking all my waste areas, I drill a one-eighth inch hole in the center of my rosette. I'll use this as the base of the circle cutter for my router.
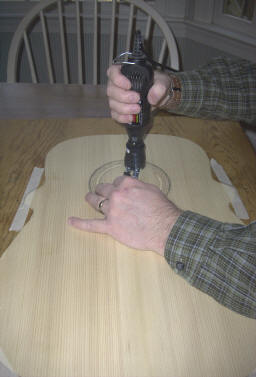
I have attached a circle cutting jig to my Dremel tool, with a very narrow bit in the chuck. First I set the cutter to cut the outside of the rosette channel. Taking great care, because the bit breaks very easily, I slowly rout around the channel.
In this case, the bit broke just before I finished the first channel. I had to improvise from there, using a different kind of bit, with more of a point.
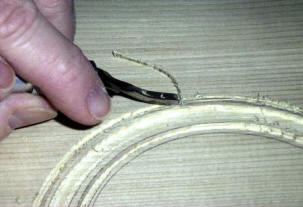
Because I used a conical bit to cut the rosette channels, I had to go behind with an Exacto blade and clean out the channels. First, I used a V-shaped blade to clear out the center of the channel. Then I used a very narrow, flat chisel to flatten the bottom for the channels.
Basically, I went back to the old school method of chiseling out the rosette channel. Not my preferred method. I like power tools. However, it's always a good idea to have a Plan B.
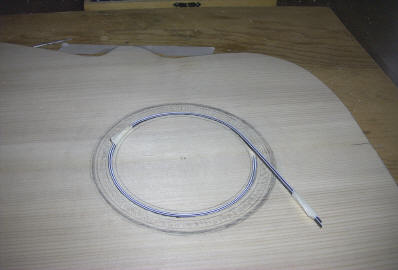
Now I begin to fit the rosette strips into the channels. As I mentioned earlier, each circle is made up of between eight and fourteen thin strips of colored acetate. You can see that I have them taped together in this picture. If you don't find a way to keep them straight, it's like putting socks on an octopus.
Don't ask me how I know this...
Before I place the strips in the rosette channels, I place a little bit of cyanocrylate glue into the bottom of the channels. This is to keep the strips from flying out later.
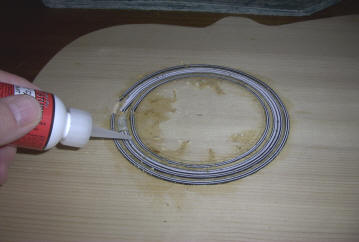
In this picture, I have allowed the rosette strips to settle in place, and am going back to flood the strips with thin cyanocrylate glue. The glue fills the gaps in the rosette, and bonds the strips in place and - more importantly - to each other. I was wearing a mask and a magnifying shield, and I can tell you that this nasty stuff still burned my eyes and sinuses something awful! And, yes, it is a terrible mess. Don't worry, though, it will all clean up in the next step.
After I let the glue set - about three to five seconds with this stuff! - I put the top aside for a couple of days to let the strips rest. They are made of acetate, which becomes soft in the presence of a solvent. Allowing it to sit for a day or so lets the strips become stiff again. That's important for the next step.
After letting the top sit, I go at the rosette with my scrapers, slowly working them down to the surface of the wood, until they are very smooth and well defined.
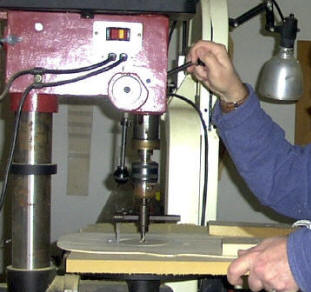
Then I cut the final soundhole with a flycutter in my drill press. Like a lot of my tools, this is an extremely dangerous implement. Sometimes I can't believe I use it without a flak jacket and a helmet.
The flycutter is a sharp blade that runs parallel to the drill bit, at about 900 RPM. I have a deep and abiding respect for it, and am certain to keep my fingers far away from the revolving blade.
Because it is not counterweighted, it is very off balance. For that reason, I clamp the top to a heavy piece of three-quarter inch MDF, to keep the blade from grabbing the top and flinging it across the shop.
Don't ask me how I know it will do that. Just trust me.
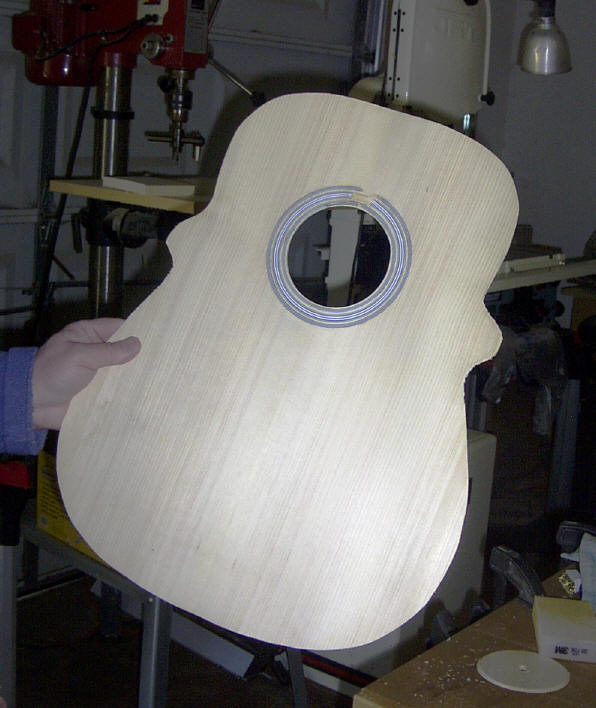
The result? Well, you can see it below. The rosette is completed. You might note that there is a gap in the rosette at the top of the soundhole. This will be covered later by the fingerboard of the guitar.
We're still a long way from finishing the top, though!
After we have completed the rosette portion of the soundboard, it's time to put on the underlying braces that support the top under the intense pressure of the steel strings. The bracing, which has developed over the course of the last 150 years to include pieces which enhance the guitar's tone, are glued to the underside of the top in a precise manner.
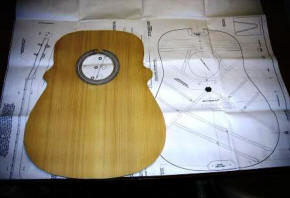
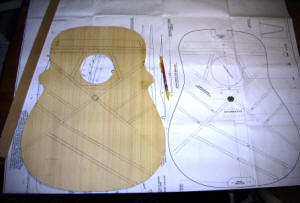
Here is the top, and the plans that I obtained from C.F. Martin Guitars in Nazareth, PA. I am a strong devotee of Martin guitars, and so I use their expertise as a starting point for most of my work. If you're going to imitate someone, I always say, imitate the best!
You can see on the plans the intricate web of interior bracing used by Martin on their guitar tops.
Bracing patterns have changed a lot over the last three hundred years, since the development of the first guitar. Different types of guitars use different types of bracing.
I begin by flipping the top and placing it over the drawing of the bracing pattern on the plans. Then I start marking off the ends of the braces.
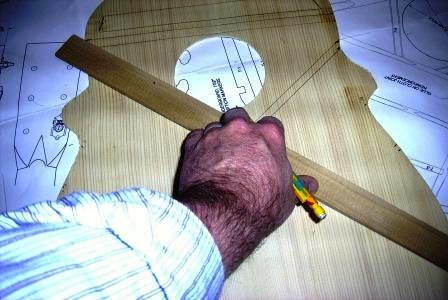
Then I begin to connect the marks using a straightedge.
Ideally, when I'm done, the drawing on the back of the soundboard should look almost identical to that on the Martin Guitars plan. This gives me a pattern for installing the braces.
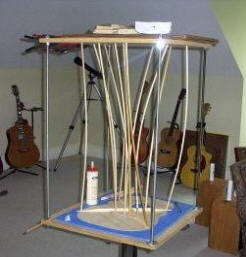
This contraption is called a Go-Bar deck. It may be one of the handiest clamping fixtures I've ever encountered. I use if for a lot of operations. Basically, it's just two pieces of 2' x 2' three-quarter inch plywood, connected by four threaded rods and about sixteen jam nuts. The clamps themselves are nothing more than quarter-inch and three-eighths inch hardwood dowels, cut to a specific length.
For this operation, after gluing the braces on the top, I place one end of the dowel on the glued brace, and the other on the top of the Go-Bar deck. The stick has to be bent, which produces downforce on the clamped piece. Here, I'm clamping the major X-brace.
There are a number of ways to make braces for a guitar. Cumpiano and Natelson demonstrate the most elemental method, in which they split sticks of bracing from a piece of quarter-sawn spruce. I've done this too, and find it to be a major pain in the neck. It may be a bit of cheat, but I buy my braces straight from the Martin Guitar factory, pre-cut, pre-arched, and already in their basic final shape. I will do some trimming and cutting on them later, but at about $35 a complete back and top set, they're worth the money.
Here's another picture of the top in the Go-Bar deck. And, I'm about to impart another Frugal Guitarmaker's secret. Many luthiers (pronounced loo-tee-ays - a fancy word for people who make stringed instruments) spend either a lot of time or a great deal of money acquiring a dished tray on which to do their bracing. The theory is that the dished tray will help the braces - which are carved with a slight arch - to force the top into a similar arch. This makes the top stronger, in theory, and better able to handle the inevitable changes in temperature without cracking. I have found that using a piece of high density foam padding under the top does the exact same thing, and I can by it at the local drugstore (as a pad for kids to use during naptime at the daycare) for about five bucks. The pressure of the Go-Bars on the center of the plate presses it down into the pad, forcing the edges up into the outer brace edges. By clamping the center of the brace first, I make the top slide into place before I clamp the outside edges. The result, when the glue dries, is that the top is nicely domed, without the need to spend over a hundred dollars or endless hours putting together a dished assembly tray.

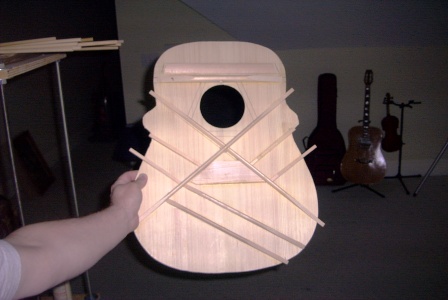
And here's the finished top - almost ready to glue to the rest of the body. I still need to trim the ends of the braces, and do some shaving on them with my chisels and finger planes, and I'll show that later, but for the most part this top is just about finished.
TO BE CONTINUED
COME BACK SOON!