RICK HELMS WOODWORKING
SHAKER LIBRARY TABLE
PART III: BUILDING THE DRAWERS AND FINISHING THE TABLE
I learned how to cut dovetails by hand years ago by watching Roy Underhill do it on The Woodwright's Shop on PBS. After watching the show a couple of times, I went out to the shop, grabbed some scrap walnut, and built Elaine a dovetailed box with a mechanical pencil, a ruler, and a dozuki backsaw.
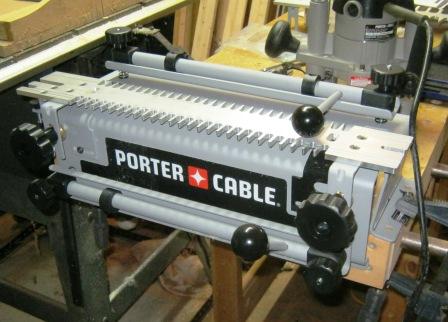
I hate cutting handmade dovetails. I can do them, but I'd rather not. That's why I love my new dovetail jig!
For the drawers, I decided to use pre-dimensioned poplar instead of dimensioning my own material. The poplar is available cheaply at Home Despot, and it's almost infinitely renewable. I also like poplar because it smells like bacon when you machine it. But that's not important now. I used 4"x 1/2" x 4' boards for the drawers. The drawers themselves are only three inches high, so my first job was to rip the poplar boards down to 3" width on my tablesaw. No pics, because you've seen me do this before. You've also seen me do crosscuts on the crosscut sled, so no pics of that either. Think of it as an opportunity to exercise your imagination. Let's just say I wound up with two sets of poplar of the proper dimensions to build the drawers.


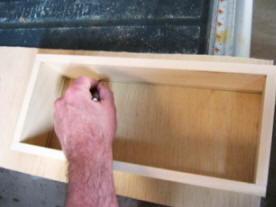
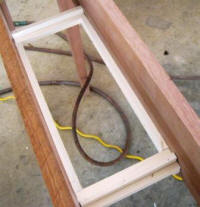
In these pix, I'm routing out half-blind dovetails. That means you can only see the dovetail from one side of the joint. Once the jig is set up, it takes about a minute to rout out each joint. Using a pencil, ruler, and dozuki backsaw, it would take me about a half hour to do each joint. See why I love my new jig?
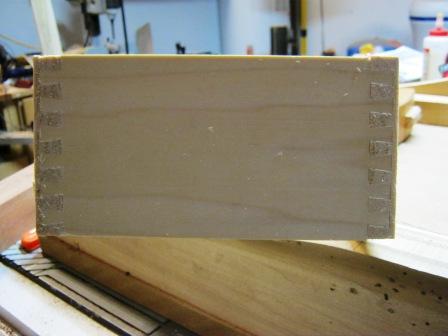
This one hasn't been sanded or glued yet. It's a lot prettier after sanding. I just fitted it together to demonstrate what a great tool this dovetail jig is.
I still need to construct the drawer bottoms before I can do any gluing.
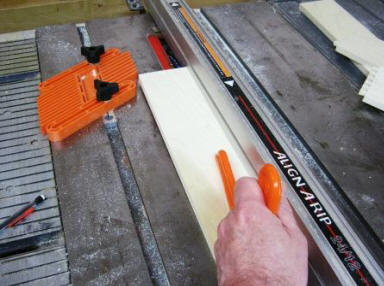

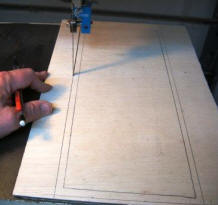
Fitting the drawer bottoms couldn't be easier. I place the assembled-but-not-glued drawer over the plywood, and mark the inside dimensions of the drawer on the plywood with a pencil (left picture). Then I mark another line a quarter inch outside the perimeter of the original marking (center picture). This will be the part of the drawer that rides in the dado slot. Finally, I cut out the drawer bottom on my bandsaw (right picture).
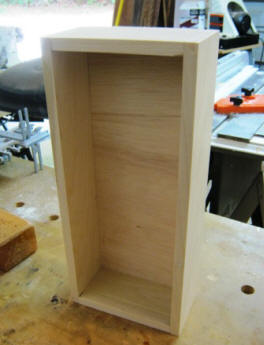
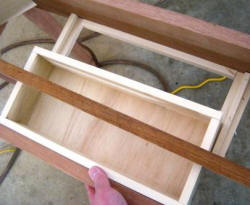
A few taps with a mallet, a few swipes with some sandpaper to clean up the dovetails, and the drawer casing is finished!
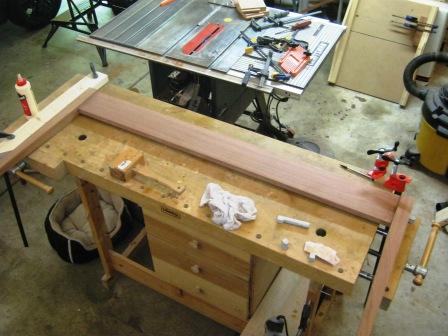
This table is five feet long. I don't have any clamps long enough to do a job like that, so I have to improvise using my workbench end vice as a huge clamp.
First, I clamp a two-by-four to one end of the workbench as a squared fence. Then I install several bench dogs in the end vice, glue up the mortise and tenon joints, and then clamp the whole thing together with the end vise. Later, I'll do the same thing with the front skirt.
Since the table is only one foot deep, gluing the side skirts into place is a snap, since I have plenty of clamps that size.
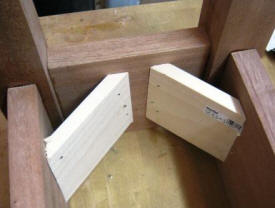
In the picture on the left, I've cut a couple of pieces of scrap poplar with 45 degree angles on my compound miter saw. Then, I glue and nail them into place to act as corner braces on each end of the table.
In the center and right pictures, I also had to build runners for the drawers. I made these out of scrap poplar also. This is why I keep my scrap wood around--why waste it when you can use it for small pieces sometime in the future.
You can see that I've gone ahead and attached the sapele drawer fronts to the drawer casings (right picture). I found some nice wooden drawer pulls at--of all places--WalMart, for about two bucks. I'll attach them just before applying the finish to the table.
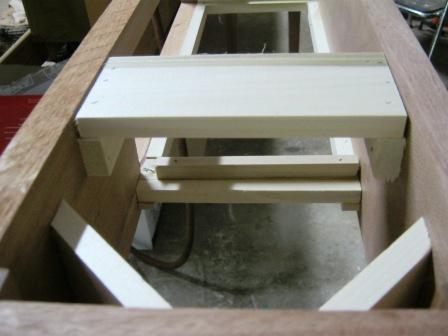
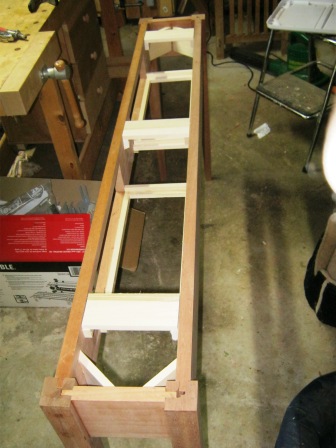
I particularly like this picture because you can see how all the mortises and tenons fit together, and how the internal components are arranged to strengthen the table and keep the drawers centered.
All that's left is to center the top on the table frame, screw it down, and apply the finish!
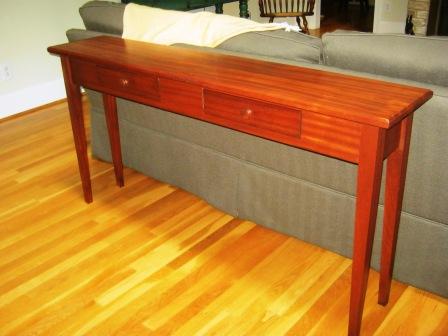
I'm a big fan of General Finishes' gel stains and gel poly finishing products. Many woodworkers are wary of poly finishes, because they aren't 'natural', whatever that means. They'd rather use shellac or lacquer to finish their projects.
I've been very pleased with how poly has worked for me. For this project, I sanded to 320 grit, and then used General's Dark Mahogany gel stain as a first coat, and applied four more coats of wipe-on satin poly clear coat.
I'm very happy about the way this one turned out, and Elaine is thrilled to get her library table. And, now that you you know how it was made, you can make one too!