Being a folk instrument, there really aren't a
lot of rules when it comes to making a mountain dulcimer. Unlike the violin
or guitar, both of which have evolved over the last three or four centuries
to embrace traditional features in size, shape, and construction, mountain
dulcimers offer the luthier a lot of opportunities for self-expression.
One area where builders can really express
themselves is in the peghead. The most elaborate of these begin with a
simple shape, and then are elaborately carved with animal heads, pine cones,
and even replicas of ship mastheads.
We won't go quite that crazy. Instead, I'm
going to focus on showing how to make a reasonably pretty peghead with a
minimum of hassle.
Some builders carve their pegheads
from a single piece of wood. That's fine, but it's very labor
intensive. I prefer to make three-piece pegheads.
First, I cut off two pieces of my
cherry, just a bit longer than the pattern from my peghead itself.
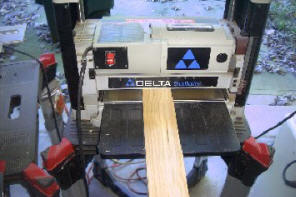
Then, I run those two pieces
through my Delta bench planer. One piece is thinned to .450 inches.
It will be used for the two outside pieces of the peghead. The other
is thinned to .500 inches, and will become the middle part of the
peghead.
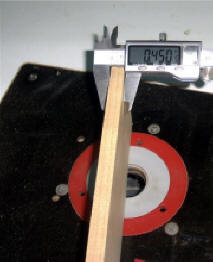
I don't leave critical measurements
like this to chance. Here you see me checking my thickness with a
micrometer. It's a little hard to see, but this piece is .450 inches
thick, on the nose!
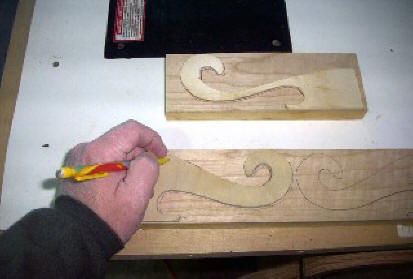
Here, I'm tracing the outline of the outside
pieces of the peghead onto the work pieces. I had previously made these
patterns out of quarter-inch thick birch plywood, using the plans as a
guide.
As you can see, I make the two outer pieces
as mirror images from the same piece of wood. The theory here is that, since
we're using rift-sawn wood, by alternating the grain in the three pieces of
the peghead, they will become one quarter-sawn piece.
On the half-inch thick work piece above the
one on which I'm drawing, I'll trace
the outline of the inner piece of the three-piece peghead. Notice that it's
shaped differently than the outer pieces. Building the peghead this way
saves a lot of carving time. Confusing? I'll show how it all comes together
after a few more steps.
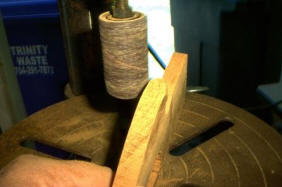
Now I cut the three pieces out using my
favorite tool, my Jet 14-inch band saw. Because of all the intricate curves
and small-radius circles in the piece, I had to install a narrower blade in
the saw. I'll replace it with a thicker blade later to resaw the back and
sides of the instrument.

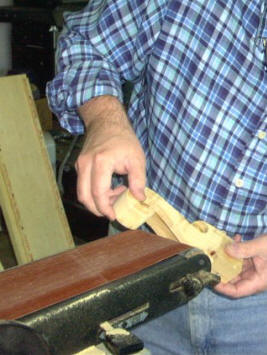
Here, I've chucked a drum sander
attachment in my drill press, and I'm sanding the inside of one of the
outer
pieces of the peghead smooth. I have to do this now, because if I wait
until after glue-up, it will be a real PITA.
By the way, everything I've done so far
can also be done with hand tools. You can thin the wood using a
hand-plane, and you can cut out the pieces using a coping saw. This
smoothing
operation can be completed using files and sandpaper. I just use the
power tools because I have them, and they save a lot of time.
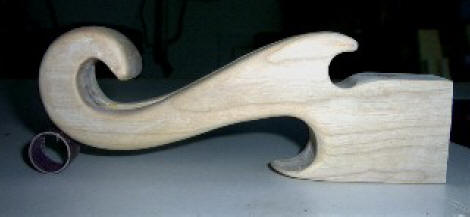
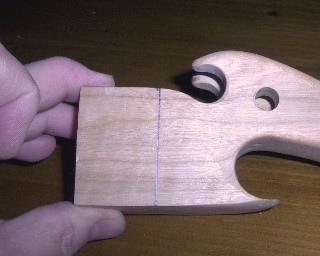
Here are the three pieces of the peghead
placed together to check before the gluing process. Now, perhaps, you can
see how they all come together. The outer two pieces will hold the
gear-drive tuning machines, and the strings will be wound on the tuning
machine posts inside the middle section.
We're not quite ready to glue, yet, though.
There's still one operation to complete.
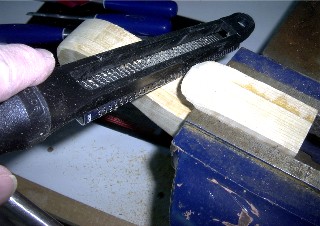
The two forward horns of the outer pieces need
to be chamfered and rounded before I can glue up the three-piece peghead.
This is so that the strings don't get fouled on them while I'm trying to
wind them on the tuner posts. It also looks little more refined when the
instrument is completed. It's easier to do it now than it will be after the
peghead is glued, so I change to a larger drum sander attachment in my drill
press, and free-hand the shaping. It's stuff like this that allows the
luthier to provide the instrument with those hand-made touches.
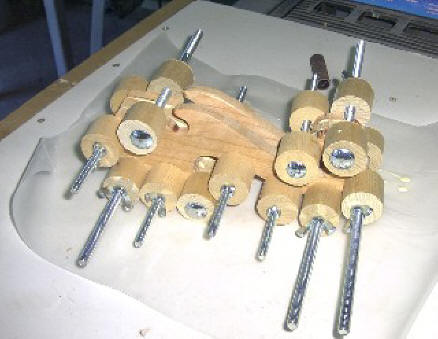
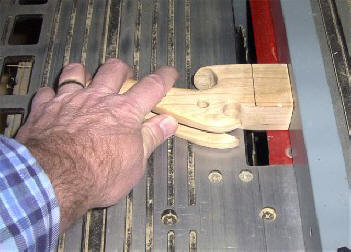
Now it's time for glue-up. No, this isn't the
roller skate from hell. I've spread glue on both sides of the central
section of the peghead, to avoid getting glue on the inside of the pegbox.
These violin clamps are perfect for
applying the pressure for the glue to cure. I make these myself, from
one-inch dowel rods and carriage bolts. They're typically used to glue backs
and soundboards to instrument sides (as we'll see in a later step), but
they're also great for spreading clamping pressure over a large area, such
as when gluing up a multi-sectioned part such as this peghead.
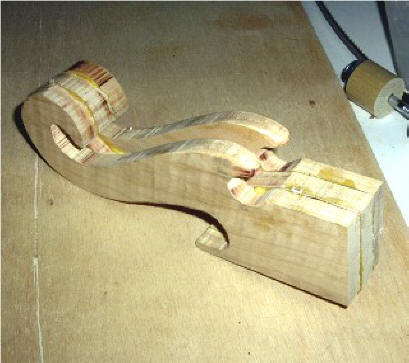
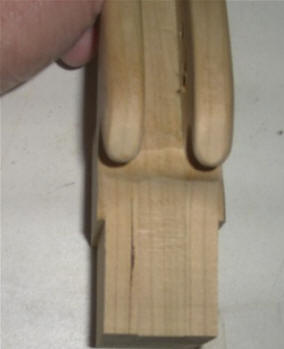
And here is the finished rough peghead,
removed from the clamps. This may seem like a lot of steps, but I actually
achieved all this in about an hour and a half, less glue-drying time. If you
were making dulcimers for a living, you could probably make five or six of
these in a day. The nice thing is that this is about the most convoluted
procedure in making a dulcimer. The rest of it is pretty straightforward.
Of course, there's still a lot to do before
this peghead is ready to become part of the larger instrument. Among other
things, we have to do some sanding.
Lots and lots and lots of sanding.
Notice, by the way, that I've placed the glued
peghead on a sheet of wax paper. This is a reminder of Helms' Fifth Law of
Lutherie: "If you don't want your work piece to become a permanent part of
your workbench, use the WP!
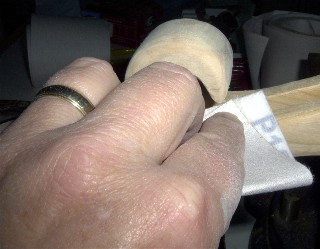
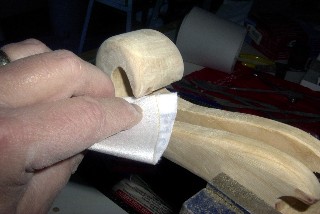
Here, I start the sanding and shaping on my
four-inch belt sander, using an 80 grit belt. This is definitely not a
process for the weak of heart. This tool can hog off some wood. It takes a
steady hand and a deft touch to keep from gouging the piece, potentially
ruining it.
I use the belt sander to gently chamfer all
the sharp edges, and to begin to shape the scroll of the peghead.
I don't spend a lot of time at the belt
sander. A little bit here goes a long way. For the rest of the process, I'll
use hand tools.
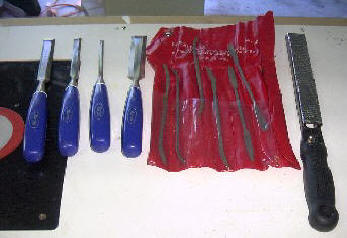
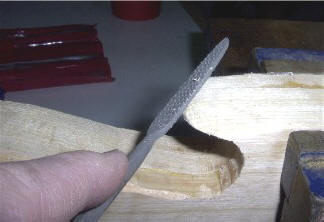
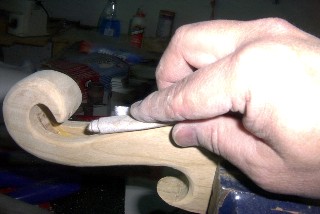
Here are my peghead hand tools. At the left
are four sizes of Marples chisels. I keep them incredibly sharp (luthiers
and other woodworkers call it 'scary sharp', because it can be frightening
just to look at the edge). A dull chisel is worthless, and can actually be
much more dangerous than an incredibly sharp one.
At the far right is a cheese-grater rasp
called a microplane,
which is good for finer shaping. Finally, in the middle is a set of rifflers
used for the finest level of shaping. When I'm done with these tools, I'll
attack it with sandpaper to finish the peghead.
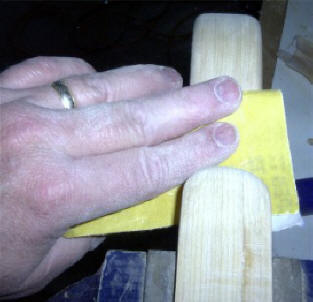
More Sanding
Did I mention sanding? If you don't like
getting down and dirty with sandpaper, maybe woodworking isn't your thing!
By the way, when you look at the peghead in
this picture (left), you can see the grain (annular rings) running straight
up and down. This is an example of how you can laminate rift sawn wood to
create a quartersawn workpiece. Quartersawn wood is more stable and
resistant to stress than rift cut wood. It's a bit of a cheat, but it really
works!
Okay, so construction of the peghead is done.
This seems like a lot of steps, but in reality the entire peghead took about
two and a half hours to complete, and I wasn't really rushing.
We're still not finished with it, though.
Still have a couple of operations to complete.
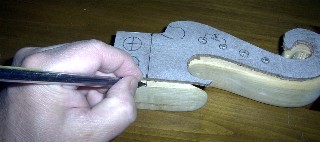
First, I use a hardwood template to mark the
peghead for a couple of machining procedures. This particular template is
used to mark the peghead for the installation of tuning pegs, and to relieve
the sides to accept the sides of the dulcimer body.
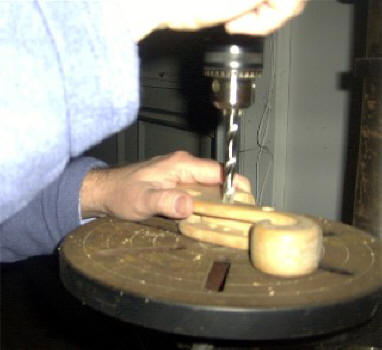
Here, I'm using the drill press to drill out
the holes for the tuning machines. I have to do this in several steps,
starting with relatively small drill bits, and working my up to the
granddaddy you see here. This way I don't have a problem with tearout. Also,
I have to be careful not to drill all the way through both sides of the
pegbox, since I will only have two tuning machines on each side. So, I drill
through one side, and then halfway through the opposite side. Later, the
tuning machine will be supported on both sides, but I won't have unsightly
open holes on each side of the pegbox.
In the picture on the left, you can see where
I've marked the peghead for relieving it to fit in the sides of the dulcimer
body. What I have to do is cut off a little wood on the peghead end, so that
I get a good clean line at the intersection of the peghead and the body.
Once this is marked, you could cut the relieve in the piece using chisels
and a dovetail saw, and I've done it that way at times. In this case,
however, I'm going to use the table saw.
I measure the thickness of the dulcimer
sides (we'll see them in the next segment), and then I set the table saw
blade to that height. BEING INCREDIBLY CAREFUL (because this tool can rip
your hand to shreds), I run the peghead through the saw, back and forth,
moving away gradually from the saw fence, until I have cut away the entire
relief. Then I turn the piece over and do the same thing again to the other
side.
Here's the result. I've removed just enough
wood from the sides of the peghead tail to allow me to glue in the sides of
the dulcimer body, and make one clean continuous line between the body and
peghead. With the exception of drilling some tiny holes for positioning
screws when I install the tuning machines, I'm now finished with the peghead.
The peghead is far and away the most
complicated process to complete when building a dulcimer. The rest of the
instrument is fairly straightforward. So, let's move on to building the body
of the instrument!