PART THREE
Building the Body
Just as I did on the guitar, I used my Jet 14
inch bandsaw to resaw a single piece of the cherry into a bookmatched set.
Then I ran the two pieces through the Delta bench planer until they were
approximately .110 inches thick.
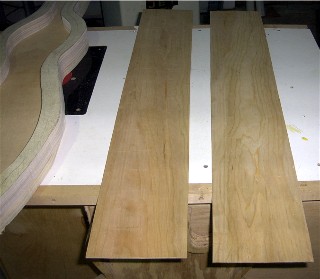
These are the two pieces of the cherry back
for the dulcimer, ready to join. I cut the joining faces on my Delta bench
jointer. You can also do this with a shooting board and a fore plane, which
I have done on occasion. Most of the operations I describe in this section
can be done with hand tools, but it's foolish to own a tool and not use it,
so I used the power tools this time.
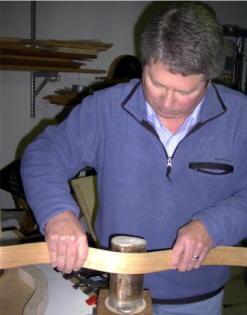
In this picture, I've put the back into a
joining board. There are literally dozens of ways to join bookmatched sets
of wood into a single piece. I made this joining board for about $1.65,
which was the price for two yardsticks at Home Despot that I screwed into a
plywood base. The plywood was a piece of scrap I had lying in the shop, and
the wedges are also made out of plywood scrap. I used the yardsticks because
the mountain dulcimer has one of the longest bodies of any hand-held musical
instrument, and my usual joining board was too short to accommodate it.
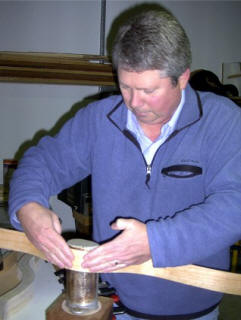
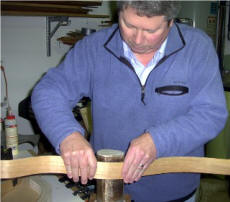
To join these pieces, I line up one piece
against a yardstick. The other piece is glued, and mated to its twin, and
then I jam the wedges between the workpieces and the other yardstick. This
exerts a surprising amount of clamping force, assuring a good joint for the
back. I use pony clamps to hold the two halves of the back down at the
joining board ends, because cherry--like maple--has a tendency to warp and
cup when it is thinned. Clamping it keeps it from moving while the glue
sets.
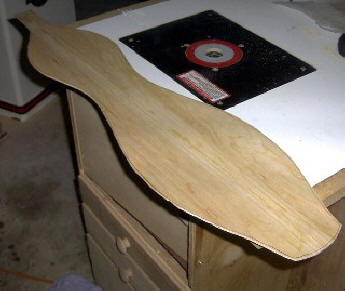
After I take the back out of the joining
board, I scrape the glue squeezeout from the joint, and draw the outline of
the dulcimer body onto the blank. After running it through the bandsaw, I'm
left with this back piece cut roughly to the shape of the final instrument.
What could be easier?By the way, I
finally decided to make the soundboard out of Sitka spruce, and I ordered
the pieces from Stewart-MacDonald. I repeated this process with them.
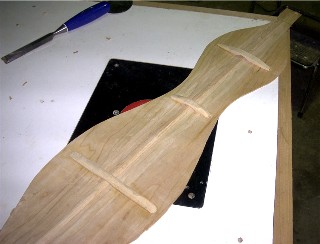
The back of the dulcimer still needs some
bracing to strengthen it and provide stiffness. Again, because this is a
folk instrument, I decided to keep the braces fairly rustic. There is one
brace that runs the length of the back along the glue joint. This is called
the 'marriage strip', because it assures that the two halves of the back
will stay together. Then I install three transverse braces to provide
additional stiffness to the back.
In many instruments, these braces and the
marriage strip are made of crossgrain spruce. I decided to use cherry,
mostly because I had some left over. Besides, this is a folk instrument, and
I'd imagine that Appalachian backwoodsmen would not have gone to the bother
of constructing spruce braces for the back. These work just fine, they
weren't appreciably heavier than spruce, and the cherry braces mated with
the cherry back seemed to help the tone.
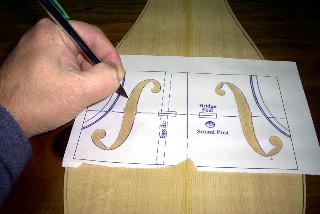
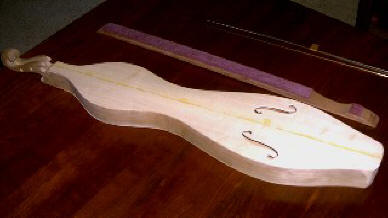
I finally decided to use viola-style 'f'
holes for the soundboard, instead of installing the rosettes. I downloaded
this pattern from the Internet, from a set of plans for viola. That's why
you see the notations for the bass bar and sound post. Dulcimers don't use
sound posts...on the other hand, maybe a soundpost would help a dulcimer's
tone and volume. Might want to try it someday.
In any case, I cut the outlines for the 'f'
holes, and then transfer them to the spruce dulcimer top.
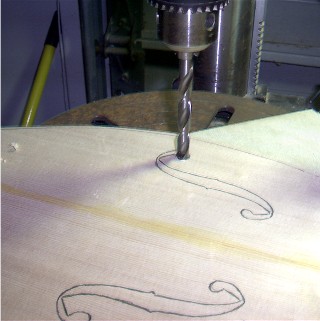
I begin the process of cutting out the 'f'
holes by drilling out the circular ends using my drill press and a brad
point bit. I put a piece of scrap plywood underneath the soundboard, to
prevent tearout.
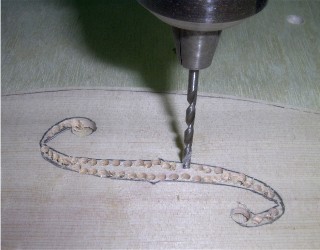
Next, I chuck a thin brad point bit into the
drill, and cut a series of perforations along the edge of the 'f'
hole outline. The more you can cut, the easier the next couple of
steps will be. On the other hand, you have to be very careful, because
drilling along the grain this way could cause a split.
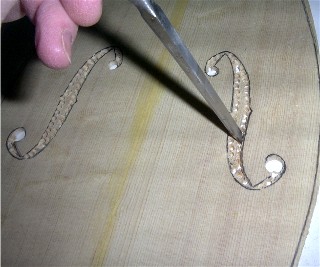
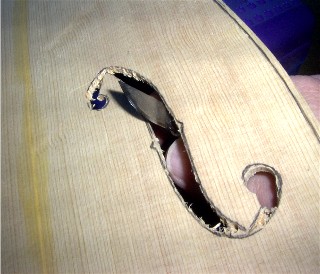
Here, I use a thin paring chisel to punch out
the interstitial wood between the perforations. Again, I have to be very
careful, because in some cases I am chiseling right in the middle of an
annular ring, which is the weakest part of the wood. Too much pressure, and
I could split the soundboard along the ring.
Don't ask me how I know this. Just trust
me, it can be done.
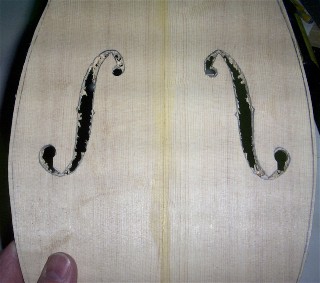
Here is the result. Not very pretty, I'll
grant you. From this point on, I'll turn to files, knives, and sandpaper to
finish the soundholes.
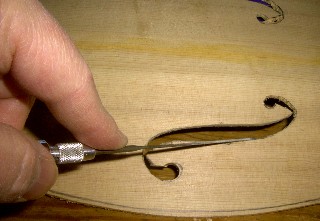
The next step is to begin carving the shape of
the 'f' holes with a scalpel.
That's right. You read that correctly.
Scalpels are excellent wood carving
tools. And, yes, I have slipped and cut my thumb with this little baby. More
than once. Someday, I'm going to invest in one of those nifty little
chain-mail thumb protectors for woodcarvers.
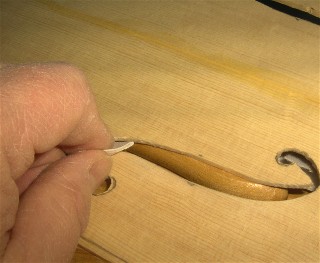
I smooth out those sections that the scalpel
can't using a needle file, and then attack the 'f' holes with several
grades of sandpaper. From cutting the holes on the drill press to completing
the 'f' holes takes about an hour and a half.
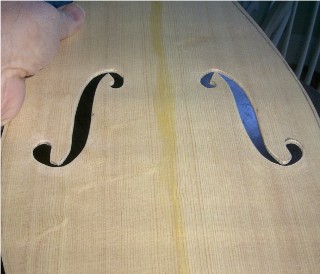
The finished product. If I had spent another
hour on them, I could have made them look as nice as the 'f' holes on a
seventeenth century Strad viola, but I decided to try to stay consistent
with the concept of the mountain dulcimer as a folk instrument, and to keep
a vague sense of roughness in the work.
The top and back are now finished. It's
time to bend the sides.
I really love side bending. Luthiers have
invented a number of different kinds of side bending machines, but I prefer
using a good old bending iron, water, and my own two hands.
When wetted and exposed to heat, wood
fibers can stretch. Once they dry, they retain the shape into which they are
bent. I resawed a long piece of cherry into two bookmatched sides, which I
then thinned in the bench planer to about .090 inches. Then I soaked them
for about ten minutes in water, while I heated the bending iron. The bending
iron has a heating element inside of it, kind of like a laundry iron. I know
the bending iron is hot enough when drops of water dropped onto it dance
around.
I take the soaked cherry dulcimer sides,
and place them against the bending iron, rock them back and forth, and wait
for steam to build up in the inner wood fibers. Slowly, I can feel the wood
give, and when enough heat is present the wood bends like plastic.
This is an acquired skill. I can't tell you
how many sides I split or broke before I got the hang of this. Now, I find
the process of hand bending an almost Zen-like exercise, as I listen to the
steam build in the wood and feel it yield beneath my fingers. Finding the
right place to apply the heat so that the bend will be placed correctly is
something of an art, kind of like fishing with spears.
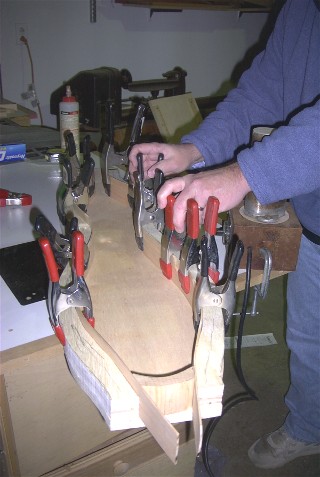
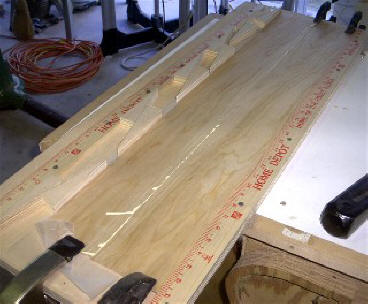
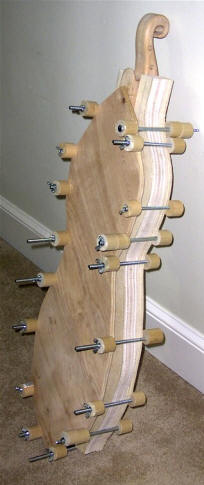
When you hot-bend wet wood, it typically won't
hold the shape unless it dries first. So, after bending the sides, I clamp
them into an outside mold built to the shape of the finished dulcimer. I
built the mold out of two sheets of 3/4 inch plywood. To avoid denting the
sides, I clamp them using spring-loaded pony clamps that use rubber jaws.
They keep the bent sides in place while they dry.
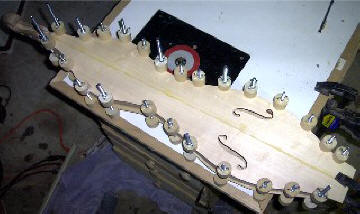
After the sides are dried, they can be
removed from the mold without losing their shape.
Note that I went ahead and cut a tailblock
(lower center of the picture, left) that will eventually become the tail of
the finished dulcimer. Not only does it serve as an additional clamp,
pressing the sides to the mold, it also gives me an opportunity to determine
whether the tailblock needs to be trimmed to fit the sides closely. The
tailblock is made from cherry scrap left over from the pegbox-- I try never
to waste wood if I can help it.
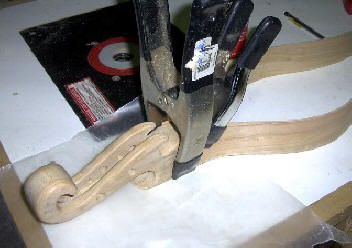
After the sides are dry and stable, I can
finally glue them to the peghead. This is the point where the sides are
glued into the areas of the peghead that I relieved on the table saw.
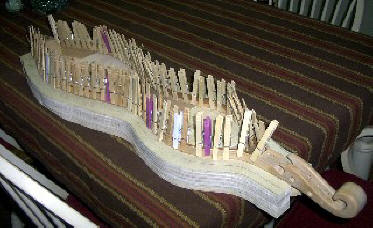
This is referred to as the 'obligatory lining
picture' since it appears in almost every lutherie website. In order to give
the top and back enough gluing area, I need to attach a layer of mahogany
kerfed lining to the sides.
While the glue dries, the lining is held in
place by 'low-tech spring-loaded specialized luthier lining clamps' -- or,
as you may know them, clothes pins. Individually, they don't have much
clamping strength. Put sixty of them together though, and they're pretty
stout!
Okay, now that the top, back, and sides are
all completed, it's time to put it all together.
The first step is to attach the back to the
sides. In order to assure that the shape is correct, I need to keep the
completed sides/peghead/tailblock assembly in the outside mold.
First I turn the assembly upside down in
the mold. Then I spread glue on the bottom edge of the sides and the
linings, position the back on the assembly, and give the glue a minute or
two to tack up. Once the glue becomes tacky, the back is less likely to
slide around on it.
The piece of plywood shown here is called a
'caul'. Because the mold is larger than the actual dulcimer, it's very
difficult to apply even clamping pressure to the back. So, I made a clamping
caul out of half-inch plywood, and cut it to the same size as the mold. Once
I position the back on the sides in the mold, I cover it with the clamping
caul and apply the clamping pressure using some of my violin clamps. As I
do, I carefully check the periphery of the joint, to make sure that there
aren't any gaps. This dulcimer will not be edge-bound, so I can't have any
gaps in the glued joint of the back and sides. Using this system, if I find
a gap, I can apply another clamp to close it.
Once I take the completed back and sides
assembly out of the mold, I'm done with the mold and the clamping caul. Now
I can glue the top to the assembly, and because the top is the same size as
the already assembled back I can clamp the top down directly, using my
violin clamps. Now the dulcimer box is completely closed up.
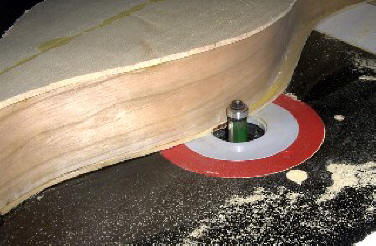
Over the last several pictures, you've seen
the router table component of my combination rolling shop. Now it's time to
use the router.
I trim the overhanging edges of the top and
back using a flush cutting bit. To do this, I use something called a
'climbing cut'. This means that I feed the dulcimer body into the router
blade in the same direction that the blade is turning. This approach reduces
the chances of cracking the top and back, but it's dangerous because the
10,000 rpm router bit could grab the body and pull it toward the cutter,
along with my hands. As with almost all power tool processes, I'm very
careful when doing this.
By the way, you can also do this using a
really sharp chisel or a block plane. In fact, using a good sharp block
plane would probably be a much safer method, and perhaps be somewhat more
spiritually fulfilling at the same time. Maybe I'll do an instrument
assembly page in which I only use hand tools, just to show that you don't
need a shop full of power tools to build a nice stringed instrument.
And, here's the completed body, after routing
the top and back flush with the sides.
I still need to sand the body, break the
sharp edges, and prepare it for finishing.
Next to the body is the fretboard that
we'll build in the next segment.
NEXT:
PART FOUR
Building the Fretboard,
Completing Construction, and Finishing the Dulcimer