
PART 3
Preparing the Neck
Over the years, there have been a number of methods used by luthiers to construct guitar necks. Attend the annual convention of the Guild of American Luthiers, and you are likely to run into several debates on which way is 'right'.
The answer, of course - as is almost always the case with this diverse art - is that the 'right' way is the way that works for you.
Many builders construct laminated necks, with belief that you can do this with slightly less expensive, non-quartersawn wood, and that by laminating (gluing together) three or four boards face to face (and by alternating the grain direction) you effectively create a quartersawn neck blank.
I've done it this way, and it does have its advantages. The largest advantage I've found is that it allows you to put interesting designs in the laminates by including thin pieces of darker or lighter colored wood between the main boards constituting the neck block, and it allows you to include a decorative volute on the underside of the headstock. This is a feature on many higher-end Martin D-class guitars, and was used on most of their guitars built before WWII.
The volute (see picture below) was actually a holdover from an earlier neck construction technique using a V-shaped scarf joint. In the solid blank necks used now by Martin, they have no real utility, and are used for decorative purposes only. Since I am demonstrating the process for building a guitar using the simplest procedures possible, the neck on this guitar will not have a volute. It will, however, be constructed using the scarf joint method.
Picture of a volute on the backside of a guitar headstock (Courtesy 13thfret.com ). It's the pyramid-shaped pointy bit.
Shown to the left is a guitar neck from Martin Guitars in Nazareth, PA, complete with the volute on the headstock. This neck was CNC machined from a solid block of mahogany on a computer controlled milling machine.
Behind the finished neck is the blank I will be using to construct the neck on my guitar. It is Honduran mahogany, almost quartersawn (about 15 degrees rift), with very fine grain. It should make a very nice neck.

The Martin neck has a headstock angle of approximately 15 degrees.
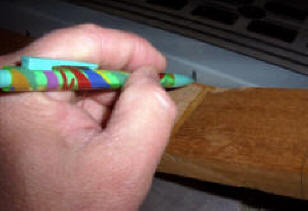
I measure this angle using a really cheap plastic gauge.
Yeah, I'm a skinflint, but the thing works.
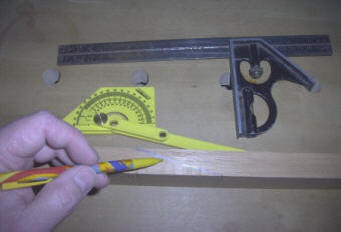
I transfer the angle to the narrow end of the mahogany neck blank, and use a square to mark two vertical lines indicating the beginning and end of my scarf joint cut.
There are lots of ways to cut the scarf joint, from using a back saw to a fancy Japanese dozuki. Kathy Matsushita shows a neat jig for cutting the joint on a table saw, at her website:
http://pweb.jps.net/~kmatsu/htmlpages/scarfjig.html
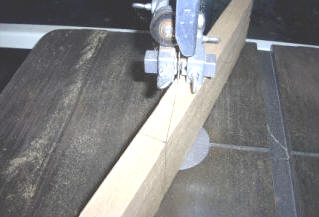
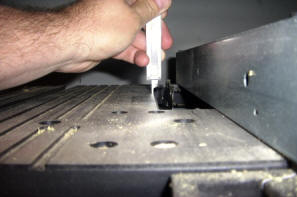
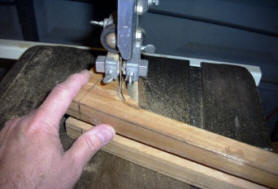
I've built one of those jigs, but because my table saw has a small blade it is difficult to cut all the way through the blank dependably. So, I use my favorite tool, the Jet 14 inch bandsaw.
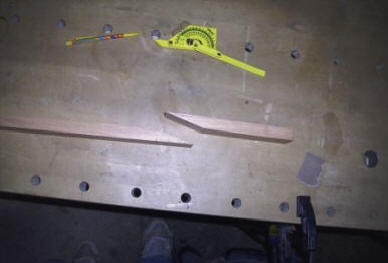
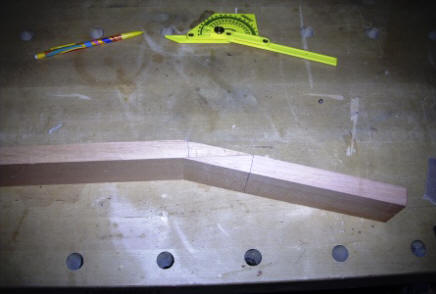
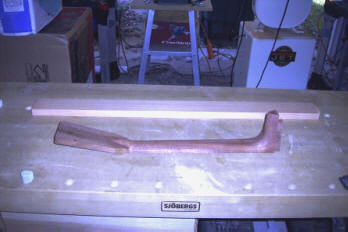
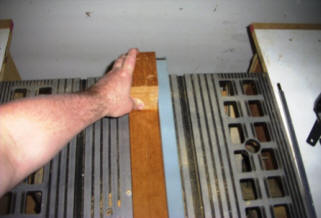
When I'm done, I have two pieces of mahogany, with roughly the same angle.
When I flip the headstock piece over, and move it under the main neck piece - voila! We have the traditional Martin guitar neck angle!
This actually serves two purposes. First, it conserves wood by using as much of the blank as possible. Second, it preserves the strength of the long grain all the way up the neck blank, and from the top to the bottom of the headstock. This should protect the headstock from shocks from things like dropping the guitar and knocking it over, which - being somewhat clumsy - I am likely to do.
Of course, using this method you lose that lovely volute, but most guitars built these days don't have them anyway.
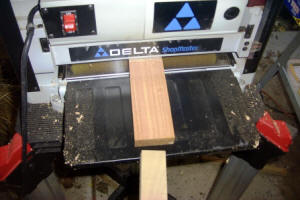
This neck isn't ready to glue just yet, though. First, I need to thin the headstock. Eventually, I will cover the front of the headstock with a veneer of rosewood or ebony. If I leave it at its original thickness, the tuners won't fit.
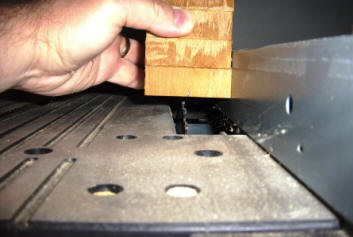
For this operation, I turn to my power planer. Notice how I'm pushing the piece into the planer with a narrow piece of poplar. I am also standing off to one side, because planers have been known to spit small pieces like this back out at roughly the speed of sound.
While I thin the headstock, I also thin a matching piece of mahogany I'll use later for the headstock "ears".
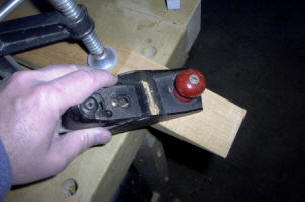
After thinning the headstock piece, I line up the two gluing surfaces and give them a few quick passes with my block plane.
This is a very old plane, which I inherited from my father. It still shaves with the best of them, though. Better than many new ones.
What I'm doing here is trying for a uniform, totally flat gluing surface, so that I will get maximum adhesion between the neck and the headstock.
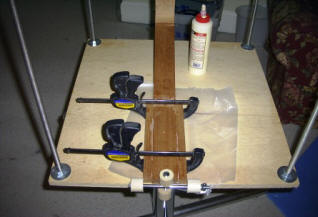
Now I'm ready to glue. I use my cabinet-maker's bench as a gluing board, being careful to first place some wax paper under the piece to keep it from becoming a permanent fixture in my shop. Then I use the bench clamp to hold the neck blank in place, with the headstock braced against a bench dog. After gluing the two pieces with fresh Titebond aliphatic resin glue, it's just a matter of clamp, clamp, clamp.
I don't worry much about squeeze-out at this point, since this neck still has a lot of work to be done on it. Most of the dried squeeze-out glue will be machined away very quickly after the neck is taken from this makeshift gluing jig.
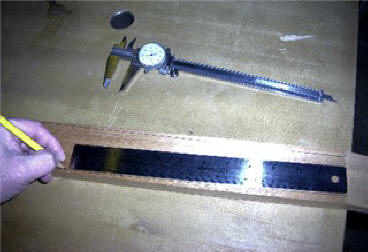
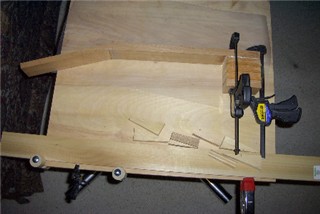
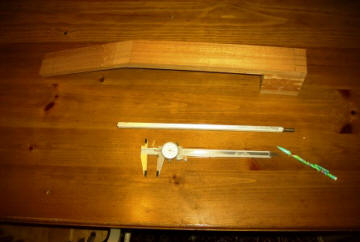
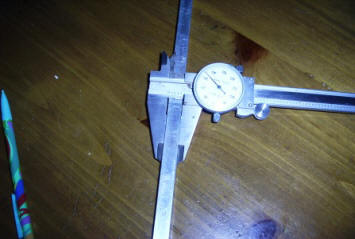
Here, I'm laying out the lines for the neck, using a ruler, a dial caliper, and my ever-trusty pencil.
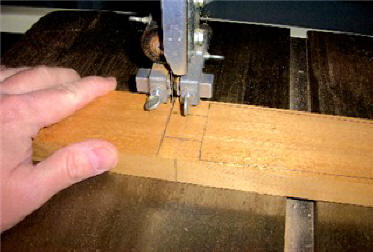
I purposefully made the neck block longer than needed. Here, I'm cutting off the excess using my Jet 14-inch bandsaw. You can see the layout for the eventual tenon pretty clearly here.
The goal is to waste as little wood as possible. True Honduras mahogany is becoming difficult to obtain, and in fact many guitarmakers are turning to Spanish cedar as an alternative neck wood.
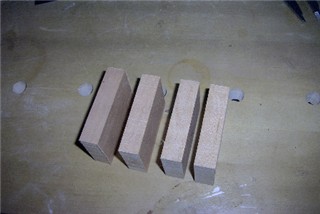
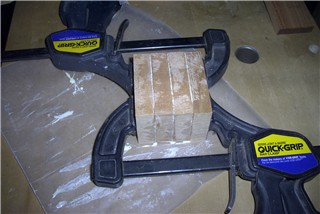
I use the excess wood from the neck to build the stack that will eventually become the neck heel. I simply saw them to the same length, and then glue them together to make the stack.
At this point, I'm also careful to alternate the grain direction, which is ever so slightly rift (about fifteen degrees). This stabilizes the heel, and will provide strength down the line when I carve it and fit the hardware for joining the neck to the body of the guitar.
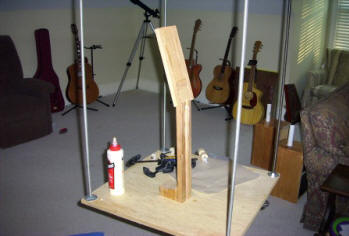
After the stack is dry, I glue it to the neck blank on my joining board.
Notice how I use wax paper underneath the glued portion. It's slowly beginning to take the shape of a guitar neck now!
We still have a long way to go, though.
The next step is to install the truss rod. Unlike guitars strung with nylon or gut strings, steel strings place tremendous forces on the guitar neck. It is a testament to the strength of the woods in the necks that they don't snap every time you string them up.
To counter these forces, the Martin Guitar company began installing truss rods in its steel-string guitar necks back before the Second World War. Originally, these were simple steel rods that helped the neck counter some of the pulling force of the strings.
As time went on, engineers began to realize that it was possible to use the truss rod to help control the action (the distance between the strings and the frets) through the middle of the neck, which still tends to develop some forward bow. In order to do this, they invented an adjustable truss rod. Essentially a bent rod with threaded ends, it works by having one end permanently fixed in the neck, and the other able to twist. By adding torque to the adjustable end of the rod, you make the rod bend in one direction or another. The force of the rod can force the neck to bend with it, thereby countering the pulling force of the strings.
Pretty clever, eh?
Anyway, now we need to install our double-action truss rod. I obtain these from the Martin Guitar factory, and they work about as well as any I've used. You can build them yourself, of course, but like most things I've discovered that the time you put into making a decent truss rod would cost more than the ten or twelve bucks you'd spend buying one.
Above is a picture of the neck blank and the truss rod itself. I have the calipers in the picture, because we will be making a lot of very close tolerance measurements.
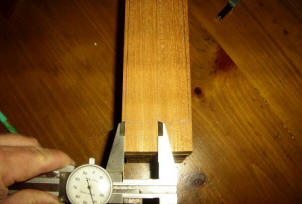
I start by finding the exact middle of the neck blank. In order to be effective, the rod should run through the very center of the neck. If it is off more than a millimeter or two, it could cause twist in the neck over time, eventually ruining the instrument.
Next, I measure the width of the truss rod. It comes to about .435 inches. I don't want it super-tight in the neck channel, as this could cause splitting. So, I decide to make the truss rod channel in the neck about .450 inches wide to give the rod a little room to move.
There are any number of ways to carve out the truss rod channel in your neck. One of the most popular is to use a router table. Several years ago, while trying to rout out a channel with my router table, the router bit came loose from the collet, and started raising into the piece. Before I could say - well, just about anything - it had cut through the bottom of the neck, ruining about five hours of work. I had to junk that neck and start all over.
These days, I prefer to use a dado blade in my table saw to cut the channel. I've never had a table saw blade change its height the way the router did. I begin by setting the regular blade at exactly 90 degrees, and then moving the table fence out so that the blade is exactly centered on the blank.
Then I remove the regular blade and install my dado blade. My table saw isn't large enough to run a stacked dado. Instead, I use something called a wobbler - a blade attached to an adjustable eccentric center, that makes the blade oscillate side to side as it cuts. Since it is rotating several dozen times a second, it cuts a channel with relatively straight sides. The downside, in most cases, of using a wobbler dado is that it also cuts a slightly curved bottom in the dado. This isn't a problem with the guitar neck, because the bottom of the truss rod is also slightly curved - makes for a really nice, tight fit.
The wobbler dado blade is set to adjust in 128th of an inch increments. That made it easy to set it at just about .450 inches wide. Just to be certain, however, I ran a scrap piece of poplar though the saw to do a test cut.
I use a miter gauge to keep the scrap poplar straight, and to keep my fingers away from the blade. This thing could mangle a stray digit, and I kind of like my opposable thumbs!
The truss rod fits perfectly. Now, I have one more set of measurements to make.
Ideally, the truss rod should lie within an 1/8th to 3/16ths of an inch from the bottom of the neck. I will carve and sand away a slight amount of the very bottom of the neck when I get around to doing the actual fabrication, so I want to make certain that I don't carve right into the truss rod channel. That would be really, really bad.
So, my first measurement is to see how thick my neck blank is. According to the calipers, it's about .820 inches.
One eight of an inch is .125", and 3/16ths is the decimal value of .1875"

So, if I subtract .20" from .820" ( to assure a minimum distance of somewhere between 1/8" and 3/16" between the bottom of the truss rod and the bottom of the neck after carving and sanding), I get a total depth of the truss rod channel of .620 inches.
I don't want the channel to run all the way into my headstock, because I plan to place the adjustable end of the truss rod in the body of the guitar. I could place it in the headstock, in which case I would simply run the channel all the way up until it cleared all the wood. Later, I'd place a cap over that portion of the head of the guitar. I don't like the look of that, though, so I always place my adjustment end in the body of the instrument.
So, with the saw unplugged, I find that point where I want the channel to end, and I mark it on the neck and on the saw fence. When the two marks meet, I will turn off my saw.
Now, I set my caliper to .620 inches, and use it to set the height of my dado blade. This is something of a black art, since the blade is at several different heights during its rotation.
It's important to find its highest point, and set there. I set the height of the blade using a wheel on the front of the saw. When it meets the caliper barrel, it's at the right height.
Okay, now for the moment of truth! It's time to cut the truss rod channel. From the beginning of measuring to making the actual cut took about an hour.
Now for THE CONFESSION.
I really screwed up with this process. Apparently, when I measured the centerline of the saw using the regular blade, I didn't count on the fact that the center portion of the dado blade was offset about a quarter inch to make up for the thickness of the adjustable center section. As a result, when I ran the neck through the saw, the channel was off center by just that much - way too much of a variance to be accepted. Putting the truss rod in that far to one side of the neck would result in terrible twisting over time, eventually making the instrument unplayable.
Boy, was I bummed. I was so ashamed that I didn't take any pictures.
This is the part of the building process where you have to sit down and consider your options. I could have started an entirely new neck. That would have been a waste of wood, however, and true mahogany is becoming more and more difficult to find.
Eventually, I came on a relatively ingenious solution. Using a piece of mahogany scrap, I cut a spline exactly the width and depth of the truss rod channel on my band saw. Then I glued it into the mistakenly cut channel in the neck. After it dried, I planed and sanded it flush with the top of the neck. Essentially, I replaced the wood that I had cut out using the dado blade. Since the glue joints are actually stronger than the wood they hold together, I didn't have to worry about the spline coming loose. Also, since this part of the neck will eventually be covered by the fretboard, the repair will never be visible.
After making the repair, I adjusted the saw fence, and recut the channel. This time it came out perfectly centered.
Lutherie is a learning process, and with each new instrument it seems that you find new and more elegant ways to cock it up.
Oh, well, on to the next step.
In most steel-string guitars, the neck is angled back somewhere between 1 and 2 degrees relative to the soundboard of the guitar. This helps to establish good action on the fretboard when the instrument is eventually strung up, while still allowing the strings some height over the soundboard itself.
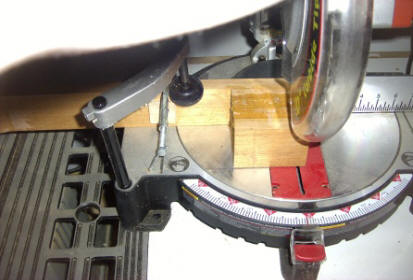
I originally built the end of my neck square to the plane of the fretboard surface. Now it's time to build in that 1-2 degree angle.
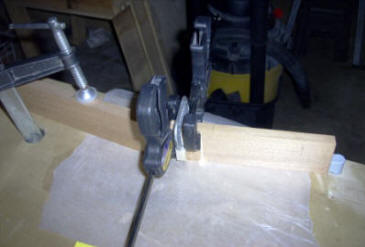
The adjustable angle chop saw is the perfect tool to do this. I simply clamp the neck in two axes against the backstop of the saw, and then set the blade to about 1.5 degrees. Start the saw, swipe it down, and the neck angle is established. As long as I keep that angle in place throughout the rest of the build, the neck should be properly set back when I do the final assembly.
Or not. Remember how cocky I was with the truss rod channel?

Here, I'm drawing the rough shape of the heel of the guitar for cutting on my bandsaw.
And, here, I'm cutting it out. Isn't this thrilling? I can hardly wait to see what happens next!
Slowly but surely, we're making a neck. Now comes the point where I glue the 'ears' on the headstock of the neck.
Up to this point, I needed the neck to be perfectly square, so that I could do things like run it through the table saw. Now, I can make the headstock wider. Recall that when I thinned the headstock piece on the power planer before attaching it to the neck, I also thinned a piece of scrap mahogany that had been squared up.
Then, I simply ripped that piece up the middle with my bandsaw, leaving two pieces of identical width, ready to be glued to the headstock. This will eventually be sawn shorter and shaped to the traditional headstock shape.
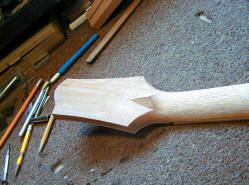
And here's the neck with the headstock ears glued on. Beginning to look a little more like a guitar neck? Or maybe a rowboat oar?
By the way, in the background of this picture are four guitars I've built over the last couple of years. See, there really is a point where they're complete!
Just wait. We're just about to get to the really fun part.